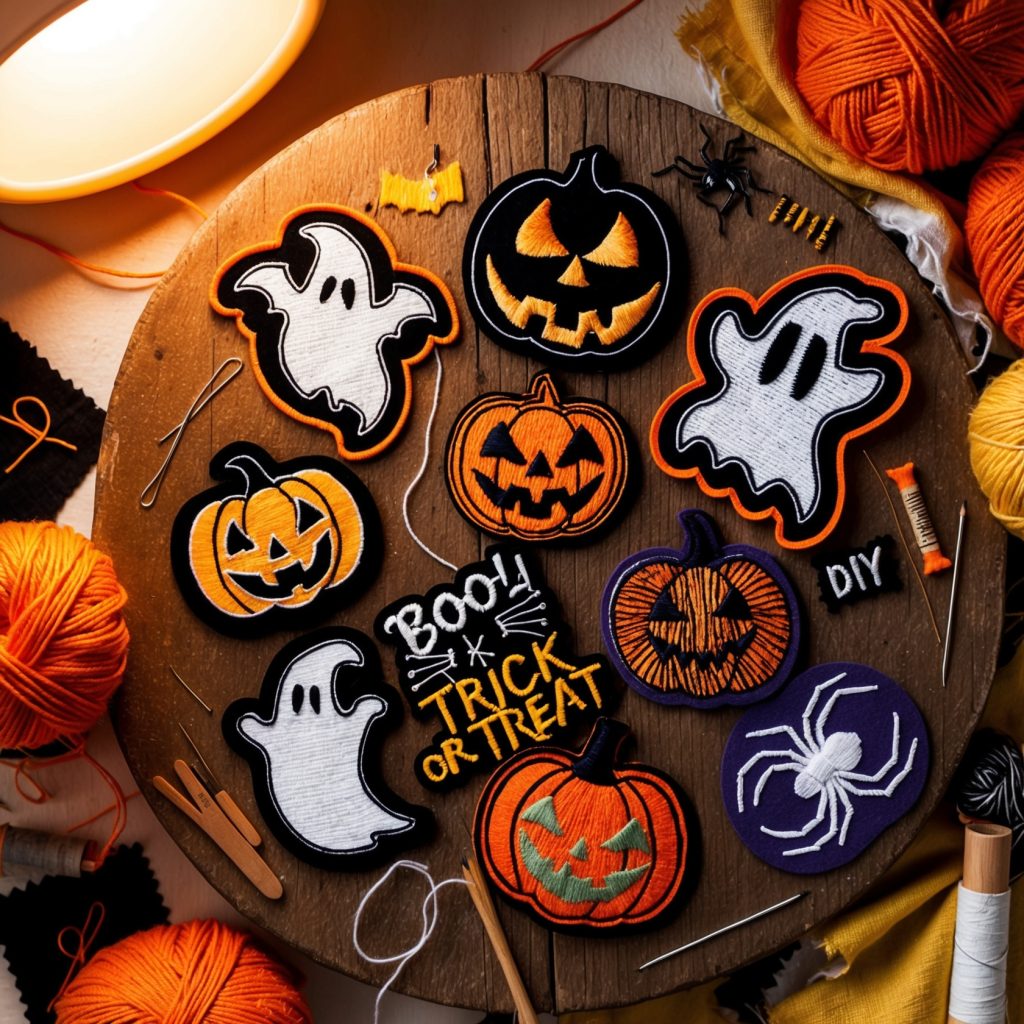
Halloween is the season of creativity, bringing out our love for everything spooky, mysterious, and fun. While costumes, pumpkins, and decorations make up the usual Halloween must-haves, DIY Halloween patches are becoming a hot trend among craft enthusiasts. These patches add a unique, personal touch to clothing, bags, and accessories, and they’re a fun way to showcase your Halloween spirit without the need for a full costume. Making Halloween patches at home also allows you to get creative with designs, themes, and materials. In this guide, we’ll explore the art of making DIY Halloween patches, from spooky design ideas and material options to tips for getting the perfect finish. Let’s get started and turn your Halloween patch ideas into reality!
Why DIY Halloween Patches Are Perfect for Halloween
There are many reasons why Halloween patches are perfect for this season. Not only are they small, versatile, and easy to make, but they also allow you to add a touch of Halloween to almost anything. Here’s why DIY patches are a must-try for craft lovers:
- Customization: DIY Halloween patches allow you to create a design that’s uniquely yours. Whether you prefer spooky skulls, cute pumpkins, or classic Halloween symbols, the patch design is entirely in your hands.
- Affordable and Eco-Friendly: DIY patches can be made with materials you already have, which is great for those who want to craft sustainably. Repurpose old fabric scraps, leftover threads, or vintage materials to create patches that have both style and eco-consciousness.
- Perfect for Personalization: Patches are perfect for personalizing clothing, accessories, and even home decor. A simple jacket or tote can be transformed with a Halloween patch, making it special and festive without a full costume.
DIY Halloween patches are an excellent choice for crafters looking to celebrate Halloween in a creative, fun, and personalized way.
Materials You’ll Need for DIY Halloween Patches
Making Halloween patches is straightforward, but having the right materials on hand will make the process smoother and more enjoyable. Here’s a list of essential items you’ll need:
- Fabric for the Patch Base: Choose sturdy fabrics like canvas, denim, felt, or cotton. These materials are easy to work with and can handle stitching and fabric paint.
- Embroidery Floss or Thread: Embroidery floss allows for vibrant colors and is ideal for sewing intricate details onto your patch.
- Needle: For hand-stitching, choose an embroidery needle that’s appropriate for the fabric you’re using.
- Scissors: Sharp scissors are essential for cutting out your patch shape and any intricate designs.
- Fabric Glue or Iron-on Adhesive: If you want a no-sew option, fabric glue or adhesive backing works well to affix your patch to your item.
- Pencil or Fabric Marker: For sketching your design before you start stitching or painting.
- Paints and Markers: Fabric paints or markers are perfect for adding color and detail, especially for designs that may be difficult to stitch.
- Backing Fabric (Optional): Adding a second layer to the back of your patch gives it more structure and durability.
With these materials ready, you’ll have everything you need to start making your Halloween patches!
Step-by-Step Guide: Making Your Own Halloween Patch
The beauty of DIY Halloween patches is that you can make them as simple or elaborate as you like. Here’s a step-by-step guide to creating your own patch from scratch.
Step 1: Choose Your Patch Shape and Size
Decide on the shape and size of your Halloween patch. Round, square, and oval shapes are classic and easy to cut, but Halloween shapes like pumpkins, ghosts, or bats add an extra festive touch. Keep the size in mind—patches are usually small, between 2-3 inches, which makes them easy to place on clothing or accessories.
Step 2: Sketch Your Design
Using a pencil or fabric marker, lightly sketch your design onto the fabric. Start with simple lines, then add details as you go. Common Halloween designs include:
- Jack-o’-Lantern Faces: Simple yet iconic, with different expressions to choose from.
- Spiders and Webs: Perfect for adding intricate detail without too much effort.
- Witch Hats or Broomsticks: These are simple to draw but have a big Halloween impact.
- Black Cats and Bats: Classic Halloween animals that are easy to outline and fill in.
If you’re not confident in your drawing skills, print out a template of your design, place it under the fabric, and trace it lightly.
Step 3: Add Color with Paint or Markers
If you’re using fabric paints or markers, now is the time to fill in your design. Fabric paints add vibrant colors and can create shading and highlights, making your patch look more polished. For a vintage look, consider using muted colors or creating an ombre effect.
Tips for adding color:
- Layer Colors: Layer darker shades under lighter ones for depth, especially on elements like pumpkin faces or ghost shadows.
- Add Highlights: Use white or light colors to create highlights on certain areas, like a shiny skull or the fur on a black cat.
- Outline in Black: For a cartoonish effect, outline your design in black. It helps your image pop and adds a touch of whimsy.
Allow the paint to dry completely before moving on to the next step to avoid smudging.
Step 4: Stitch Details for a Handcrafted Look
For extra detail, use embroidery to stitch along certain lines or add texture. Embroidery floss is perfect for this, allowing for bold, colorful stitches that give your patch a unique look. If you’re new to embroidery, here are some simple stitches that work well on Halloween patches:
- Running Stitch: Great for outlining shapes, like spider webs or the edges of a pumpkin.
- Backstitch: Ideal for fine lines and text, like spooky sayings or details on a skeleton.
- French Knot: Adds texture and depth, perfect for eyes on a jack-o’-lantern or adding dimension to a witch’s hat.
Stitching over paint or markers gives your patch a dimensional, handcrafted feel that adds to its charm.
Step 5: Cut Out Your Patch
Once your design is complete, cut out the patch carefully around the edges, leaving a small border if you prefer a frayed or rustic look. For a cleaner edge, consider cutting the fabric in a simple, even shape around the design.
If you want a more polished edge, use a zig-zag stitch or blanket stitch around the border. This technique not only gives the patch a finished look but also prevents fraying.
Step 6: Apply Backing (Optional)
For added durability, attach a piece of backing fabric to your patch. This step is optional but highly recommended if you want the patch to withstand frequent wear. Use fabric glue or sew the backing onto the patch, then trim any excess material.
Step 7: Attach the Patch to Your Item
Once your patch is complete, it’s ready to attach to your item! You can sew it directly onto a jacket, bag, or hat, or use fabric glue for a no-sew option. Iron-on adhesive is another popular choice for those who want a removable option, as it can be ironed on and peeled off when needed.
Spooky DIY Halloween Patch Ideas
Now that you know how to make a Halloween patch, let’s explore some unique design ideas. These themes offer a wide range of creativity, making each patch a spooky, personal masterpiece.
1. Classic Jack-o’-Lantern Faces
Nothing says Halloween like a jack-o’-lantern. Create patches with different expressions, from goofy grins to sinister smirks. This design is great for beginners since it’s simple to draw and stitch.
Tip: Use glow-in-the-dark paint for the eyes and mouth to make your jack-o’-lantern patch extra spooky at night.
2. Witchy Symbols
Witch-inspired patches are ideal for Halloween, adding a touch of mystique and magic to your accessories. Try designs like:
- Crescent Moons: A witchy staple that’s simple to create with just a few stitches.
- Witch Hats: Add stars, moons, or stitching details to give the hat more character.
- Potion Bottles: A fun design where you can play with colors to create a “bubbling” effect.
Tip: Experiment with metallic threads for the moon or stars to give the patch a magical shimmer.
3. Spooky Sayings
Incorporate Halloween phrases like “Boo!,” “Trick or Treat,” or “Enter If You Dare” to give your patch a playful touch. Lettering allows you to play with different fonts and styles, from dripping horror text to elegant Gothic script.
Tip: Use backstitching for clear, defined letters and bold colors to make the words pop.
4. Skeletons and Skulls
Skeletons and skulls make for great Halloween patch designs and can be as simple or detailed as you like. Try a smiling skull, a skull with crossbones, or even a tiny skeleton hand.
Tip: To add a touch of glamour, use silver or gold metallic threads to outline the skull or add accents to the bones.
5. Haunted House Scene
For a more elaborate patch, try a miniature haunted house complete with bats, moonlight, and eerie windows. This design takes a bit more time, but it’s sure to impress!
Tip: Add small, glowing eyes or windows using glow-in-the-dark paint for a haunted effect.
Creative Tips and Tricks for DIY Halloween Patches
Making Halloween patches is all about creativity and having fun with the process. Here are some additional tips and tricks to make your patches stand out.
1. Experiment with Mixed Media: Don’t limit yourself to just paint and thread. Add sequins, beads, or even fabric scraps to add texture and depth to your patch design.
2. Play with Different Textures: Use different materials for your patches, such as velvet, leather, or felt, for a unique look. Velvet works particularly well for witch-themed patches or mystical designs, adding a luxurious feel.
3. Add Glow-in-the-Dark Details: Glow-in-the-dark fabric paint or thread can make your patches come to life at night, adding an extra layer of Halloween magic.
4. Layer Designs: For more intricate patches, try layering fabrics or thread colors to create a 3D effect. This works especially well for elements like spider webs, ghosts, or layered witch hats.
5. Make It Removable: If you want to reuse your patch on different items, add an adhesive or Velcro backing to make it easy to attach and detach.
Using DIY Halloween Patches to Decorate Your Halloween Outfit
One of the great things about Halloween patches is how versatile they are. Here are some fun ways to incorporate DIY patches into your Halloween wardrobe and decorations.
1. Customize Your Jacket or Hoodie: Sew or glue a collection of patches onto a denim jacket or hoodie for a Halloween-themed outerwear piece that’s unique to you.
2. Accessorize Your Bag or Backpack: Add patches to your bag for an instant Halloween upgrade. This is a great way to carry the Halloween spirit with you wherever you go.
3. Decorate Your Hat or Beanie: Place a patch on a beanie or hat for a subtle Halloween touch that you can wear throughout October.
4. Turn Them into Ornaments: Attach a ribbon loop to the back of each patch and hang them as Halloween tree ornaments or on a wreath for a spooky touch.
5. Add Patches to Your Pillow Covers: Create a Halloween-themed throw pillow by adding patches to the cover. Perfect for seasonal decor in your living room or bedroom.
The Joy of Crafting Your Own Halloween Patches
DIY Halloween patches are more than just a fun craft—they’re a way to bring your Halloween spirit to life in a unique, personal way. Each patch tells a story, from the choice of design to the final stitching, and they’re a wonderful way to show off your love for the spooky season. Plus, they’re small and easy to make, allowing for endless possibilities and a collection you can grow every year.
With Halloween patches, you can add a dash of spookiness to any item you choose, making it a versatile and rewarding Halloween craft. So gather your materials, unleash your creativity, and start crafting patches that will make your Halloween season more memorable, one stitch at a time. If you are interested in purchasing high-quality custom patches, feel free to call us at 866-903-4875 or fill out one of our FREE quotes here.


